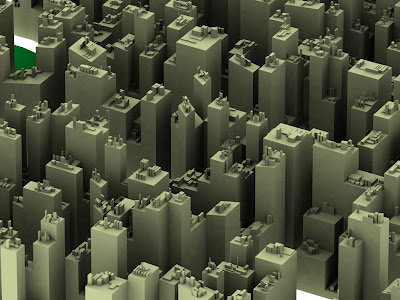
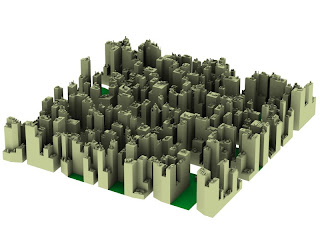
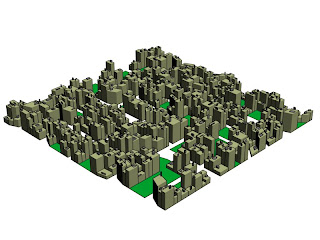
 First of all, you will need a version of Autodesk's 3D Studio Max to follow this quick tutorial. Also, you will need a copy of the excellent Greeble plug-in, developed by Tom Hudson. This is a modifier plug-in useful for generating random detail for everything ranging from spaceship models, cityscapes to Death Stars (!), which can be downloaded from http://max.klanky.com/ (to install it simply copy and paste the Greeble .dlm file in the 3D Studio Max Plugins directory).
Step 1: Create a plane in 3D Studio Max with say 25 Length and 25 Width. Make sure Edged Faces is on from the viewport options (very important!).
 Step 2: Apply an Edit Mesh modifier to the plane and then proceed to select every third or fourth row of polygons horizontally. Non-uniform scale these rows of polygons to 50%-60% of their size and then delete them. You have created horizontal streets in your random 3D city. Now repeat the process vertically in exactly the same way only this time it doesn't have to be in continuous rows. Remember we're trying to keep the appearance somewhat not-too-"blocky" looking and fairly randomized...
 Step 3: Keeping this in mind move around some vertices here and there in the corners of all buildings to randomize the appearance of the cityscape further.
Step 4: Open up the Material Editor and in a new material slot create a Multi/Sub-Object material. Apply this to the cityscape plane. This is done in order to differentiate different parts of the cityscape. I usually use about 4-5 slots in this but let's keep it simple for this tutorial; use only two and name the 1st Base and the 2nd Garden. Assign a different sub-material to each; say a yellow-ish diffuse color for the Base and green for the Garden.
Step 5: Now under the Polygons selection of the Edit Mesh modifier, assign different material IDs to polygons accordingly. The easy way to do this is to select all polygons, assign them as ID1 (Base) and then select the few Garden polys you want and assign ID2 to them (you will see that the Garden ones turn green while all others remain yellow in color). Finally select ID1, all the Base polys that is.
 Step 6: Apply the Greeble plug-in! You probably have what is more or less a random 3D city by now. With a few minor tweakings you can get it even better but even the default settings should be good enough! I usually set Taper to 0, make sure I use all 5 Widgets available, with their Density set at 5 etc.
 As you can see, it is fairly simple and time efficient to achieve results such as this for purely random visualisations. Obviously the shortcomings of this are obvious (for starters geographically it is difficult, nigh-on impossible to adapt this technique to a more realistic GIS-driven target) but this method (and the Greeble plug-in itself!) take some beating in the time/quality of result ratio for purely "beauty" renders. (Also do bear in mind that I've tried to keep this really really simple, there are many ways to build on and improve on the few steps described above, by no means is this definitive, feel free to experiment!).
 For a future tutorial I will concentrate on the production of expressively rendered (i.e. in a non-photorealistic manner) views of 3D urban models, check the pic above for a cartoon-shaded view of an urban model...


No comments:
Post a Comment